Dienstag, 15. Oktober 2013

Life in Münster, and Jan Hedh’s graham nut raisin bread


My life in Münster is so different from the one I left behind in Berlin. Münster is so different than Berlin; It is small, wealthy, and probably the whitest city I have ever lived in. Of course, Münster has its immigrant population, but it seems to be hiding, limiting its existence to an appearance in the Wikipedia article. The natives, on the other hand, who do their week-end grocery shopping at the farmers’ market on the Domplatz with their big baskets in hand (which I am sure they ordered online from the Britishshop.com), look as if they had stepped right of a Polo Ralph Lauren catalogue (no offense, Elena). The typical Münsteraner seems to be around sixty, is white-haired, and dons a Barbour wax jacket as well as Tod’s leather shoes. The wife, of course, wears pearl earrings, and after Mass on Sunday –which they of course attend because along with the rest of the population, they are Catholic – they take their Sunday coffee at one of the quaint and elegant cafés downtown. (Despite their quaintness and elegance, tea at Krimphove is served with coffee creamer!)

There is another sort of typical Münsteraner, and that one is much younger. It is a student, and from what I can tell from the first week here, he or she, like their seniors, wears Barbour or Burberry jackets, pearl earrings, and Ray Ban glasses – because, after all, we are the hipster generation. They spend their free time getting drunk by the lake and dancing gangnam style. I have been told those are the law and business students – and that they cool off after freshman week. I really hope so.

But not just the people are different; it feels as if life has a different pace here. Life feels smaller, slower, not necessarily in a bad way, but in a way that will take some getting used to. Last Wednesday, I did my grocery shopping at the farmers’ market and it started pouring, as it does quite frequently here. Instead of hushing through the rain, trying to run their errands as quickly as possible and with grim faces, people simply sought refuge in shops and waited for the rain to pass! (I don’t know for how long, I ran my errands as quickly as possible, and rushed back to my office, my head under my coat. It was still raining when I got back to the office.) Part of the reason why life feels slower here is that you don’t depend on public transportation or, worse yet, cars – you ride your bike, and everyone has one. In fact, after learning that I didn’t have a bike yet, my neighbor’s parents brought me my neighbor’s old bike to use until I get mine from Berlin! Münster without a bike makes no sense, they exclaimed, and so, now I have one! The city is so small that you can bike just about everywhere in fifteen to twenty minutes, and usually even less than that.
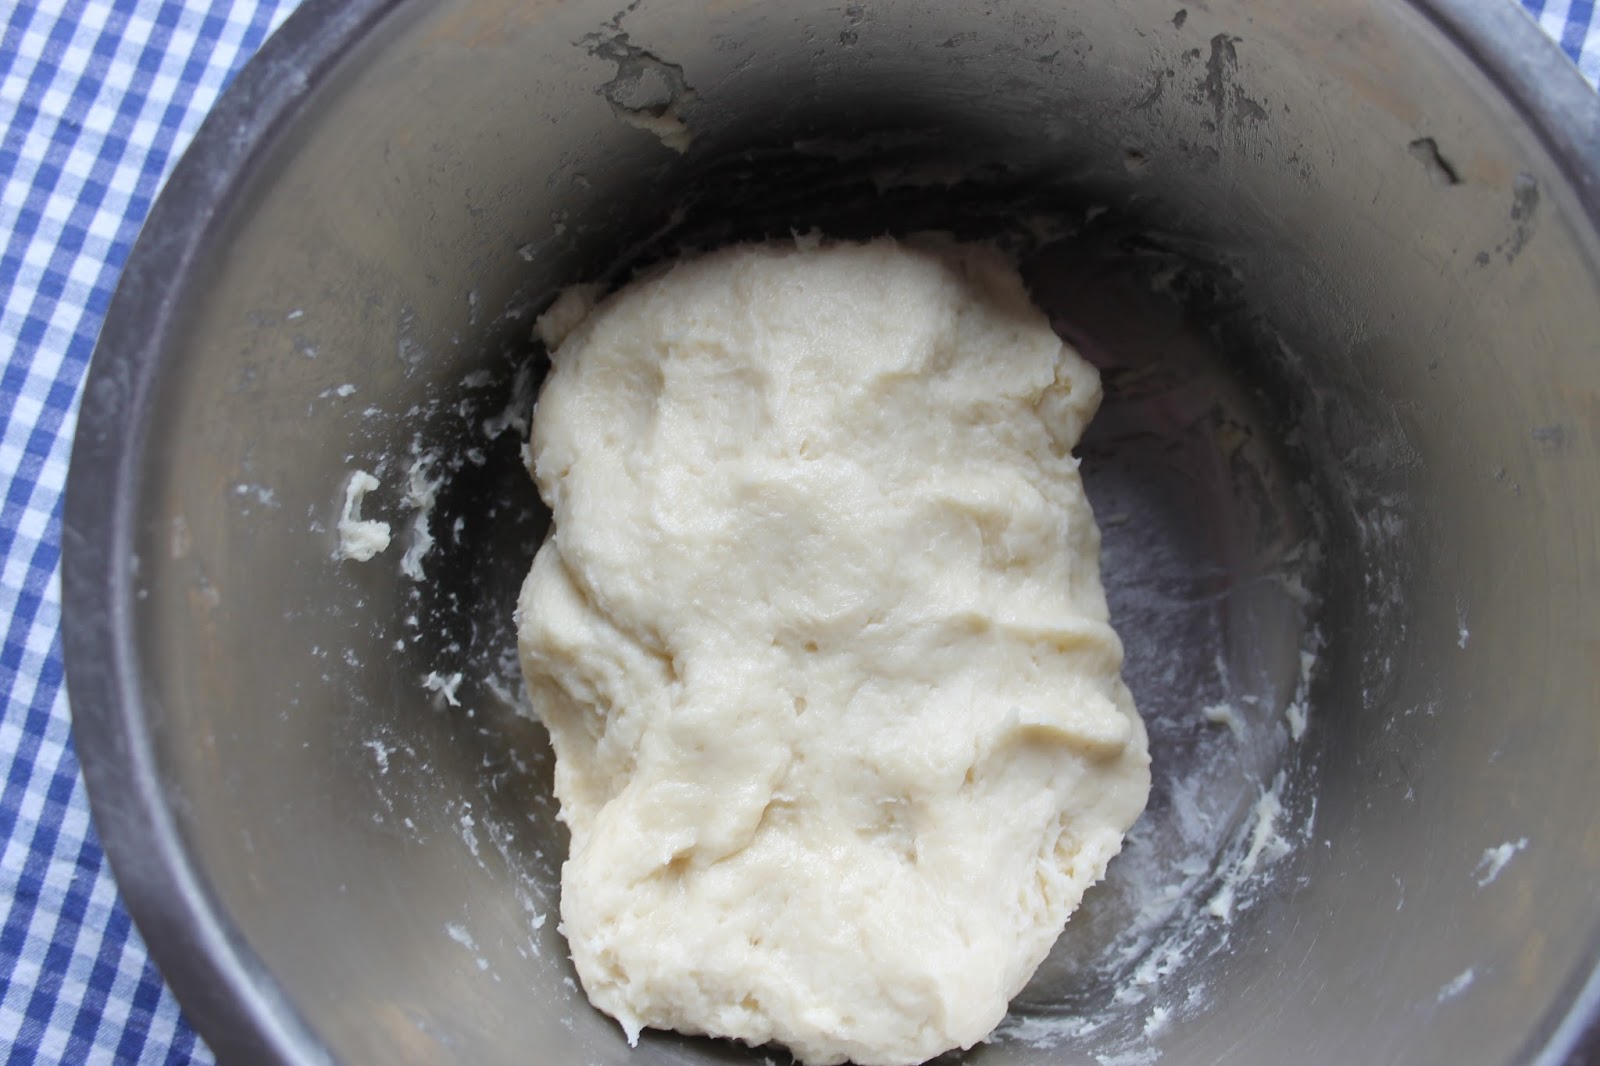
The other reason why my life feels smaller here is, of course, that I hardly know anyone in the city, so my social life is somewhere between small and non-existent. I know that this will change, and I am very, very grateful for my neighbors, who are super nice and welcomed me as warmly as I could have wished for. But for the time being, whenever I am not at the office, I am alone. This and the fact that I have neither internet nor a regular phone or even cell phone right now presents the challenge to find something to do and occupy my mind every time I come home. I started learning Spanish – yet again, but with more determination – and I read a lot, both for my dissertation and for fun. And I bake. My kitchenette is small, there is barely enough space to put down a ladle between the stove and the sink, let alone space to bake. So I figured that I should make the best of the situation and bake things that are less complicated – and usually healthier, too – i.e. bread. I may have mentioned before how much I love kneading bread dough; kneading a solid yeast dough, turning a sticky dough into a smooth and elastic one by kneading and kneading and kneading, and gradually adding more flour (usually too much, as I am impatient) while listening to the Les Choristes soundtrack works miracles, and it turns an apartment into a home.

So, with the help of Bruno Coulais and Jan Hedt, a Swedish baker and author of “Swedish Breads and Pastries,” that Allie gave me last summer (THANK YOU!), I set out to fill my apartment with flour and bread love.

I don’t know if it’s a Swedish thing (I had never heard of it before), but this particular bread is a “scalded” bread, meaning you start with a “scalding” of flour, salt and water, which you then let rest for a day. I assume this is to add a natural fermentation process as well as flavor, but I may be wrong. The rest of the recipe is actually fairly simple; you just add the flour, honey, yeast and milk mixture and the nuts and raisins the next day and give the dough time to rise. The major difficulty for me was to find a substitute for graham flour. I had read up online on Graham flour a while ago and knew that the closest approximate in Germany is Weizenschrot, shredded wheat. I don’t think I ever baked with graham flour in the U.S., so I wasn’t sure what it’s supposed to look like, but I have a hunch that Weizenschrot isn’t quite the same. So for this recipe, I ended up adding a lot of white flour because otherwise I didn’t think that the gluten would have had any chance to develop. (The gluten structures need the white stuff from inside the grain to develop – they are what gives the bread texture when it rises. This is the reason why whole wheat bread needs much more time to rise than white bread.) The original recipe calls for walnuts, but I used hazelnuts instead and liked it a lot. You can also substitute the raisins with prunes or apricots, but I was quite happy with the raisins. I think the reason I like breads like this one so much is that they always remind me of home – the flavors of my childhood and my mother’s baking. And don’t be fooled by the raisins: this is not a sweet bread. It could be enjoyed with either a nice goat cheese or with quince jam, as I did.

Jan Hedh’s Scalded graham bread with walnuts and raisins

For the scalding (Day 1):
125g (1/2 cup) water
60g (1/2 cup) graham flour
2 teaspoons salt

For the dough (Day 2):
150g (1cup) raisins
200g (7 ounces) scalding – comes out to just about the right amount
450g (3 ¼ cups) graham flour, OR: 300g Weizenschrot (mittel gemahlen, im Reformhaus erhältlich), 150g weißes Mehl
1 ½ tablespoons honey
75g (3/4 cups) butter
150g walnuts or hazelnuts

Day 1: To make the scalding:

Boil the water, pour it over the flour and the salt, and stir until smooth. Cover with plastic wrap and let it sit until the next day at room temperature.

Day 2: To make the dough:

Soak the raisins in cold water for about 30 minutes.

Combine the scalding in a bowl with the flour and honey. Heat the milk until it is luke warm and dissolve the yeast in it, then pour it into the bowl. Knead the dough for about five minutes at the lowest speed and add the butter in batches. Knead for another ten minutes. Knead longer and add more flour if needed.

Drain the raisins and fold them into the dough along with the nuts. Put the dough into a lightly oiled (or buttered) plastic container covered with a lid to rest for 45 minutes.

Push the air out, let rise again – I gave the dough a good three to four hours total to rise, but it will be less if you use more white flour, as I recommended above.

Form the rolls, and let them rise for about fifteen minutes, sprinkle them with water and bake at 250C/480F.

Enjoy with strong cheese or flavorful jams (or both!).


Samstag, 17. August 2013

The Pies We Ate

This is the microwaved version the next day. Pie crust is a little too thick!

Oh, how I envy the Obamas for their choice of summer retreat! Three years ago, my sister, Christine, and I spent our summer vacation with our good friend Allie and her family on Martha’s Vineyard [for the European reader: Martha’s Vineyard is a small island right off Cape Cod that has become renowned in recent years for its illustrious vacationers. Sort of like an American Sylt. It is not actually a vineyard, nor does it produce wine, I think.]
Somewhere between The Great Gatsby and Anne of Green Gables, the island charmed me with its enchanted forests, its long beaches, and its 5 o’clock cocktails served on the patio. I loved that we made bread every day, I loved that the Brudneys think that when on the Vineyard, one should barbecue every day. I loved getting our groceries at Morning Glory and our fish (well, for some of us) at Larsen’s Fish Market. And I loved the pies we ate! We bought them from a little road stand somewhere on the island and carefully transported them home, where we would relish them with a scoop of vanilla ice cream. As the fork cracked through the flaky, salty pie crust, it would reveal the deep purple blueberry nectarine filling. Soon, the filling would form a blissful union with the vanilla ice cream on our spoons, the steaming heat of the blueberries gently transforming the ice cream into a creamy heap of bubbles. We were in heaven.

We had found our quest: to make the perfect pie crust! Thankfully, the West Tisbury library carried a copy of Baking with Julia. And indeed, the book contains a recipe for – the perfect pie crust! We tested it immediately, but our results were unsatisfactory. So we returned the book and bought another pie from the road stand.

Three years later, as the Obamas are vacationing on the Vineyard, I was craving blueberry nectarine pie. I think it’s unfair that Barack and Michelle should be in a place where they can get the perfect pie while I am sitting here, alone in my apartment, as the enchanted forests and sandy beaches are fading into distant memories. So I baked myself back to the Vineyard, home of the heavenly pies. I gave Julia – who in this recipe is represented by Leslie Mackie – another chance. And low and behold, I think she is right; she does have the perfect pie crust – just the right mixture between flakiness (achieved by the vegetable shortening) and flavor (achieved by the butter). The blueberry nectarine filling is, dare I say it, every bit as good as the heavenly Vineyard pie. And that was a pretty high standard.

The secret to achieving the perfect filling is to cook half of it on the stovetop first and then mix it with the rest of the fruit. That way, you can be sure that you have the right balance of sugar and lemon juice and zest. The European that I am, I reduced the amount of sugar that the recipe asks for and threw in a little extra lemon juice and zest. You do need a pie pan for this recipe; I would not necessarily recommend a springform pan. If you use a Euro-sized pie pan (like a tart pan), I would suggest doubling the recipe. It yielded just enough filling for my nine-inch pie pan.

Make the pie crust ahead of time so you can give the dough enough time to chill. It is crucial that all ingredients be chilled; the cooler your kitchen and your hands, the better. I actually (I have to give myself genius points for this!) put the metal bowl that I used in the freezer first. The pie can also be made ahead of time and then frozen, which I actually did and was very happy with the result.

So ladies and gentleman, without further ado, I present unto you: A Martha’s Vineyard Blueberry Nectarine Pie!

Martha’s Vineyard Blueberry Nectarine Pie

The Perfect Pie Crust (adapted from Leslie Mackie’s recipe, Baking With Julia)

(Plan enough time to chill the dough for at least an hour before using it)

2 ½ cups all-purpose flour (250g)
½ tablespoon salt
1/3 cup cold unsalted butter, cut into very small pieces (85g)
2/3 cup solid vegetable shortening, chilled (Kokosfett, 155g)
½ cup ice water

Keep all the ingredients refrigerated until you actually need them, and use your hands as little as possible. If you do use your hands, wash them with cold water first! You want as cool a work environment as possible.

Step 1: Mix the flour and the salt together in a large bowl. Add the butter, using a fork and a knife to cut the butter into the flour until the mixture looks like coarse crumbs.

Step 2: Add the solid vegetable shortening (Kokosfett) and again, using a fork and a knife, cut the crumbs into the flour mixture, cutting smaller and smaller crumbs until they blend well. Then add the ice water and use your (cool) hands to knead it just until the dough has taken shape and the shortening is completely blended into the dough. This should not take longer than one minute. Refrigerate for at least one hour.


Step 1: Cut the butter, then the shortening into the flour

Step 2: Add the water

Mix with your cold hands, but not too long

Refrigerate for at least an hour!


The filling (adapted from Baking With Julia)

3 cups fresh blueberries (400g)
2 cups sliced nectarines (about 3 large nectarines)
½ cup sugar
2 tablespoons all-purpose flour
large pinch of grated lemon zest
2 teaspoons fresh lemon juice

1 tablespoon unsalted butter, cut into pieces
1 large egg, beaten with 1 tablespoon cold water (for egg wash)
Crystal or turbinado sugar, for sprinkling


Step 1: Put half of the fruit in a medium saucepan. Over medium heat, add the sugar, flour, lemon zest and lemon juice and bring the mixture to a soft boil, stirring constantly. The liquid will thicken and will turn into a purple mixture.

Add the remaining fruit, and add lemon juice, lemon zest and sugar if needed. Let cool.

Step 2: Cut the pie dough in half and roll one half out on a lightly floured work surface. If you are using a 9-inch pie pan, you want the circle to be about 11 inches. Fit the crust into the pie pan and refrigerate again. Roll out the other half for the top crust.

Step 3: Spoon the cooled filling into the pie shell, top with the unsalted butter. Lift the rolled-out circle of dough onto the pie (Leslie Mackie suggests – this is some of the best baking advice I have ever gotten – to fold the dough into quarters, transfer it to the top of the pie, and the unfold it). Press the tines of a fork against the edges of the pie.

Step 4: Paint the crust with the egg wash and sprinkle with a little crystal or turbinado sugar. Cut 4 to 6 slits in the crust and chill for about 20 minutes.

Step 5: Place the pie in the center of a preheated oven (375°F or 175°C) and bake for 40 to 50 minutes. Let cool for at least 30 minutes before you cut the crust to give it time to set.

You can easily freeze the pie for up to a month before baking it! You will have to bake the frozen pie about 10 minutes longer.

Bon appétit!

Dienstag, 23. Juli 2013

The German-American friendship cheesecake, aka: Ze Cheesecake


Dear friends,

A happy and very belated Fourth of July to all of you in the good ol’ U.S. of A.!
I hope you all had lovely picnics and enjoyed the fireworks. I thought I’d start off my backlog (so many recipes to share!) with an American classic – ze cheesecake. But beware! It’s not your regular NY style, densely flavorful, rich cheesecake with a cream cheese base. No no, it’s the German-American Friendship Cheesecake! Which shall, henceforth, be simply referred to as ze cheescake. And German cheesecakes, as the travelers and Germans among you may know, are much lighter than their American cousins. Flavors and thickness vary, there are some wonderful peach/nectarine/cherry variations, and if you are a raisin person, you will be in heaven. The concept is simple: Shortcrust pastry topped with a light Quark* filling, baked until you have a mountain of large, brown bubbles in your oven that will, inevitably, collapse almost as soon as you remove it from the oven. 
[For those readers who are not familiar with American cheesecakes -- think Starbucks cheesecakes.]

Here is my take on U.S. versus German cheesecakes. I love both, and I love them for different reasons. In American cheesecakes, I love the saltiness and the buttery richness of the graham cracker crust which so gently balances the cold sweetness of the cheesecake. But there is something about German cheesecakes that you can’t quite explain… maybe it’s the childhood memories of Saturday afternoon Kaffeetrinken, coffee and cake, usually with grown-up guests. My mom would prepare the cheesecake earlier in the morning or even the day before to then let it chill in the fridge for a couple of hours. I loved watching her in the kitchen, always ready to scrape out the bowl of cheesecake batter (possibly the best part!). But finding the patience to then wait the long hours until the cheesecake was finally cold enough to be eaten in the afternoon was a true challenge! When the guests had arrived and we were all seated around the big dining table, my Mom would then bring the cheesecake in and place it at the center of the table – presenting the true queen of the afternoon.
(I should add that this recipe, from the German cake bible, GU’s Backen, comes with the subtitle: Dafür wird man geheiratet! I wonder if that made it into the 21st century edition.)

Alas, those times are over! What has remained is an instinct that special company deserves cheesecake. So, with Emily’s birthday upon us, and my roommate’s – how shall we put it, encouragement? – I decided to take a stab at combining my two favorite features in both kinds of cheesecakes; namely, a German cheesecake with an American graham cracker crust! (Frankly, I am not a big fan of the German crust. It is just too boring.) I loosely based it on the ginger cheesecake crust recipe from Rose Berenbaum’s Heavenly Cakes. It is a very basic graham cracker crust with two tablespoons of freshly grated ginger added to it. I loved the combination of the zingyness of the ginger in the crust combined with the slightly salty flavor of the Hobbits that I used to replace graham crackers (a tip I got from my New Zealand friend, and it’s genius!).
And because it is summer and fruit is a must in anything sweet at this time of year, I topped the cake off with some frozen raspberries that I found at the back of my freezer.


Ze Cheesecake

Hobbit ginger crust

1 pack of Hobbits (250g or 1 cup of graham crackers)
60g melted butter (1/2 stick)
30g freshly grated ginger (2 tablespoons)

Quark filling

500g Quark (or 2 ¼ cups cottage cheese)
150g sugar (2/3 cups)
3 teaspoons vanilla sugar (or 1 teaspoon vanilla extract)
zest of 1 organic lemon
1 tablespoon flour
1 tablespoon cornstarch
6 egg yolks
7 egg whites
50 g sugar (1/4 cup)
50 g melted butter (1/4 cup)

Prepare the pan.

Butter a springform pan, set aside.

Make the crust:

Place the Hobbits in a plastic bag (Ziploc or similar) and make sure you squeeze the air out and the seal it tightly. Use a glass to smash the Hobbits in the bag. (You may want to do this on a larger plate because there will be some cleaning up to do no matter how tightly you seal the plastic bag.)

In a medium bowl, add the butter and ginger to the crumbs and blend until all the crumbs are moist.

Pour the crumbs in the springform pan until they fill the bottom evenly, then straighten out with your fingers.

Make the filling:

1. Set your oven to 180°C/375°F.
2. Mix quark, sugar, vanilla sugar, lemon zest, flour, cornstarch and egg yolks. Blend until smooth.
3. In a separate bowl, whisk the egg whites with the remaining sugar until they form peaks.
4. Gently fold in egg whites into the egg yolk mixture, alternating with the melted butter.
5. Pour filling on the crust and place the pan on a rack in the middle of the oven.
6. Bake for about 40 minutes.


Guten Appetit!!

* Quark is a low-fat type of fromage blanc which I don’t think is widely sold in the U.S. I hear you can get it at Whole Foods, but I think most Germans in the U.S. use cottage cheese instead.

Samstag, 22. Juni 2013

Leila Lindholm's Pizza Bianca


The Pizza Bianca before...

Well, friends, it’s been a while! We had a wonderfully busy week with my friend Emily, who came all the way from Vermont to visit! Thursday was Emily’s birthday, and because she crashed all hopes of celebrating a “Emily’s One-Cake-A-Day-Birthday-Week” by insisting that she needed a sugar detox, we happily settled for “Emily’s One-Gelato-A-Day-Birthday-Week.” The highlights were the usual: Vanille und Marille, our own Berlin version of Gelato, and the ever faithful and best gelato in Berlin, Caffè e Gelato in the Potsdamer Platz Arkaden. Our discovery of the week: Sole Mio – a combination of lemon and basil. Simply divine! We went back… several times.

For Emily’s birthday picnic, we splurged and made a pizza bianca. Our friend Anne chose the recipe from a book by a famous Swedish TV cook (at least it says so on the cover!) that had been collecting dust on my shelf, Leila Lindholm. I don’t think the recipe would have stood out to me at all – it does not contain a single vegetable and basically only consists of dairy, which I try to avoid because of my lactose free roommate. But it was totally worth it! Instead of an all-white flour pizza crust, I substituted half the amount with whole-wheat flour, which contrasted very nicely with the flavors of the different cheeses. Instead of a tomato sauce, the recipe calls for a ricotta base. The sweetness of the whey cheese wonderfully completes the crisp goodness of the Parmesan cheese. I think the mozzarella just adds a little more richness while bringing out the flavor of the Parmesan. Topped with heaps of garlic and a splash of fresh oregano and toasted pine nuts, it is irrestible right out of the oven. As your teeth find their way through the delightfully salty, garlicy, parmesan crust which slightly burns your palate, the tasty pain is soothed by the creamy sweetness of the ricotta, and wiped away by the fresh yeast crust. The three of us devoured the three large loaves in just a couple of hours… and this was after we had all had two scoops of Sole Mio!

.... and after... ready for the picnic!

Here is the recipe, loosely following Leila’s recipe from her book One More Slice.


Pizza Bianca

Makes 3 large pizzas

For the whole-wheat pizza dough:

15g instant yeast (3 tsp)
300ml luke warm water (1 ¼ cups)
2 tsp sugar
1 tsp sea salt
2 tbsp olive oil
200g white flour (1 2/3 cups)
100-200g whole-wheat flour (1- 1 ½ cups)

For the topping:

250g ricotta cheese (1 cup)
70g Parmesan (½ cup)
250g mozzarella cheese (1 cup)
50g pine nuts
6 cloves of garlic
fresh rosemary or dried oregano
olive oil
coarse sea salt
fresh black pepper

Making the pizza dough:

1. Whisk the yeast into the water, add a pinch of sugar, and let sit for five minutes until foamy. Start with about 2/3 of the suggested amount of water – you can always add more later if the dough is too dry.

2. Mix all dry ingredients together.

3. Add the yeast mixture to the dry ingredients, and mix well. Add more water or flour as needed, and knead the dough with your hands or a dough hook until it comes off easily, at least about five minutes. (Knead in the same direction for the gluten structures to develop – since we added whole-wheat flour, you may want to knead a little longer, as it contains less gluten than all-purpose flour).

4. Ta da! Let rise while you prepare the pizza. If you are in a rush, let it rise in the oven, preheated to 50º C/120º F – not hotter or you will kill the yeast!)

Making the pizza:

1. Preheat oven to 250ºC/480º F.

2.  Toast the pine nuts in a pan (no extra oil, medium heat – watch at all times, they burn very quickly!)

3. Divide the pizza dough into three pieces, roll out thinly and spread ricotta on the pizzas. Top with Parmesan and toasted pine nuts.

4. Crush the garlic, chop the rosemary and spread on the pizza, adding a bit of olive oil, coarse sea salt and fresh black pepper.

5. Bake for 5-10 minutes.

Buon appetito!!


pS: Happy belated birthday to Leila Lindholm as well, who, according to wikipedia, was born on June 21!

Samstag, 8. Juni 2013

Rose Berenbaum’s Lemon Poppy Seed-Sour Cream Cake


My now gluten-free friend lent me her copy of Rose Levy Berenbaum’s “Rose’s heavenly cakes” a couple of months ago (ehm, last December? November?) and it led a faithful, albeit quiet life on my bookshelf while I wrote my thesis. It only surfaced once, back in January, when I made a fabulous gingerbread ginger cheesecake for my birthday (post to follow, possibly the best cheesecake recipe I have discovered so far. If one is into ginger. Which one is.) Every once in a while I would sit down with a cup of tea and go through the recipes, putting post-its next to the ones I planned on baking once the dreaded MA thesis was done with. Maybe the St Honoré-trifle? Or the sumptious Bernachon Palet d’Or Gâteau from the cover?

Winter passed (eventually), sunshine came, and all of a sudden, those rich, dark chocolaty recipes did’nt look all that appealing anymore (saving them up for the winter). Instead, since two dear friends’ birthdays happened to fall on the same day, I decided to use the occasion to try out the lemony poppy seed bread. I am not a big fan of the traditional German Zitronenkuchen (the Bahlsen ones are particularly awful). They tend to be too dry, and are just – boring.

This recipe, however, brings together a nice blend of poppy seeds (though they do kind of get lost in the cake – next time, I will double the amount), sour cream (which makes for a moist texture), and lemon syrup, which adds a natural lemon taste. It is fresh and lemony, and brings back happy memories of lemonade stands with Hannah (or just the dream of a lemonade stand? I can’t quite remember if there ever was one!).

One reason to love Rose Levy Berenbaum are her precise measurements. She gives you both volume and weight measurements – and since I agree with Julia Child's friend Simone Beck on this (“Measurements matter!”), I will give you both.

Make this a couple of hours in advance so it has time to chill in the fridge before you serve it.


Rose Berenbaum’s Lemon Poppy Seed-Sour Cream Cake

For the batter:

2 large eggs
1 egg yolk
¾ cups sour cream plus 1 tablespoon (200g)
1 ¾ tsp vanilla extract* 
1 ¼ cups sugar (250g)
1 ½ tsp baking powder
½ tsp baking soda (Natron)
½ tsp salt
lemon zest, finely grated (use organic lemon!)
1/3 cup poppy seeds (50g - be generous and double the amount, I could hardly taste them)

*I used 1 Paket Vanillezucker and reduced the sugar by 10g because we were out of vanilla extract.

For the lemon syrup:

½ cup sugar (112g)
6 tbsp lemon juice (100ml)


1. Preheat the oven to 350F/175 C. Grease the baking pans (I used three small ones, but you could also use a larger bread pan. Rose recommends a 10-cup Nordic Ware Elegant Hard Pan or metal fluted tube pan, but I don’t own either or even know what they are).

2. In a small bowl, whisk the eggs, egg yolk, ¼ cup of the sour cream and vanilla until just lightly blended. Set aside.

3. In a larger bowl, blend together the dry ingredients (flour, sugar, baking powder, baking soda, salt, lemon zest, poppy seeds) until combined. Now add the butter and the remaining sour cream and mix until you get a moist dough, continually scraping down the sides of the bowl.

4. Continue on low speed, slowly adding the egg mixture until well blended.

Bake the case for 45 to 55 minutes.

5. Now comes the best part: the lemon syrup! It is really easy to make – just squeeze the lemons, put the lemon juice and the sugar into a microwaveable glass, and put it in the microwave for 90 seconds or longer. Take it out every 30 seconds and stir until the sugar is completely dissolved.

6. When the cake is baked, take it out of the oven and coat with 1/3 of the lemon syrup. Then let the cake cool in the pan for 10 minutes. Remove it and generously brush the top and the sides of the cake again. Save some (if you made the double amount) for serving.

Let the cake cool in the fridge for a couple of hours before serving. Since I can’t get enough of the lemon taste, I sprinkled my slice of cake with some of the remaining lemon syrup.


And now I am hungry again!

tightly packed, the cake lasts several days in the fridge

Mittwoch, 5. Juni 2013

Easy Chickpeasy Tomaten mit Joghurt und Minze


Ich glaube, jeder Mensch hat einen Küchencharakter: Einige Aspekte der Persönlichkeit kommen erst oder besonders intensiv in der Küche zu Tage. Dabei kann die Küche  (oder das Kochen oder das Backen) bestimmte Emotionen katalysieren. Manchmal ist sie die heimelige Höhle, manchmal ist sie der Druckkochtopf, in dem man an die Decke geht wie eine geplatzte Kartoffel. Und im Unterschied zum Leben außerhalb der Küche schmecke ich die Konsequenzen von allem, was ich hier tue, und zwar ziemlich sofort. Gestern habe ich eine Kreation aus schlechter Planung mit einer großer Portion spontanem Enthusiasmus und einer gehörigen Prise Überehrgeiz kredenzt. Das Resultat war zunächst Frust, dann aber Versöhnung. Aus selbstgemachten Ravioli wurden Spagetti mit Kichererbsensauce – mit einer Artischocke zur Vorspeise.

Eigentlich hatte ich dieses Rezept kochen wollen. Ravioli selber machen klingt super, und außerdem hatte ich schon Samstag die Artischocke für das Rezept gekauft und wollte sie nicht zu lange im Kühlschrank liegen lassen. Also, erster Schritt: Wie kocht man eine Artischocke? (Hier die Erklärung). Dann den Nudelteig angerührt. Und dann nachgedacht. Das Herz einer Artischocke wird wohl kaum für Raviolifüllung für vier Portionen reichen! Außerdem steht da auf einmal was von Nudelmaschine, so was habe ich doch gar nicht, aber selber ausrollen dauert ewig! (Der Teig soll so dünn sein, dass man die Hand hindurch sehen kann). Und dann auch noch befüllen, die Ravioli formen, kochen, essen, aber es war doch schon halb 6! Epic fail. (Das hat man davon, die goldene Regel zu missachten, das Rezept IMMER zuerst ganz durchzulesen). Also, umdisponieren. Nudelteig in den Kühlschrank, stattdessen diese Tomatensauce (von Everybody likes Sandwiches). Und die Artischocke zur Vorspeise.

Das Tomatensaucenrezept war eigentlich eine Enttäuschung, und ich würde es nicht hier zum Nachkochen empfehlen, wenn ich nicht heute die Sauce kalt zu Mittag gegessen hätte – und wieder versöhnt war.

Hier also ein Rezept für ein super einfaches, super leichtes Mittagessen. Der Joghurt und die Minze machen es zu einem schnellen Sommermittagessen, ob heiß oder kalt.

Easy Chickpeasy Tomaten mit Joghurt und Minze

3 EL Olivenöl
½ Zwiebel
4 Knoblauzehen
1 große Dose Tomaten
Salz
Etwas Gemüsebrühe (Pulver)
2 TL Zimt
1 TL Cayennepfeffer (oder nach Geschmack)
1 Dose Kichererbsen
Joghurt
Frische oder gefrorene Minze

Zwiebeln und Knoblauch kleinschneiden, Öl erhitzen und anbraten. Tomaten hinzu, mit etwas Brühe und Salz sowie dem Zimt und dem Cayennepfeffer abschmecken.

Kichererbsen hinzufügen, etwas weiterköcheln lassen. Vor dem Servieren eine Portion Joghurt drauf, mit frischer (oder gefrorener) Minze garnieren, et puis voilà!

Montag, 3. Juni 2013

Saag nach 101 cookbooks


Das Saag im Topf - die Erbsen hatte ich zu früh hinzugefügt

Einer der Vorteile davon, in der Metropole Wilmersdorf zu wohnen (im Gegensatz zum bügerlichen Steglitz) ist der asiatische Supermarkt um die Ecke. Mein Gewürzschrank ist mittlerweile so unübersichtlich geworden, dass ich am Samstag aus Versehen Kurkuma und Kreuzkümmel für die nächsten zwanzig Jahre gekauft habe. Egal, ob Senfkörner, Kardamomkapseln oder Kreuzkümmelsamen, Tian Fu hat alles und dosiert es praktischerweise nicht in diesen kleinen Apothekenreagenzgläschen (zu Apothekenpreisen) wie Ostmann, sondern gleich in der Tüte. Das macht es wesentlich leichter, den Blick auch in der heimischen Küche über den kulinarischen Horizont streifen zu lassen.

Heute also: Saag! Saag ist ein Spinatgericht, wohlbekannt vom Inder, wo es oft in Kombination mit paneer (dem in der Form tofuähnlichen Frischkäse) serviert wird. Das Rezept stammt vom amerikanischen Kochblog 101 cookbooks - ein fantastischer blog, auf den hier hingewiesen sei, allerdings verbunden mit der Anmerkung, dass sich die Rezepte in Deutschland nicht immer so leicht nachkochen lassen. So auch bei diesem Rezept: In Deutschland essen wir eher selten den im Rezept verlangten frischen Spinatsalat – es gibt ihn zwar, aber etwas zu teuer, um ihn massenweise in den Kochtopf zu stopfen, und bei weitem nicht so omnipräsent wie in den USA, wo er in ähnlichen Mengen konsumiert wird wie bei uns der Feldsalat (den die Amerikaner wiederum nicht kennen.) Also habe ich frischen Spinat durch gefrorenen ersetzt und mit gefrorenen Erbsen ergänzt. Den paneer kriegt man zwar bei unserem Reichelt, aber mit der Buttermilch im Rezept war der Magen meiner laktoseintoleranten Mitbewohnerin schon überfordert genug, den habe ich also rausgelassen. Für den ghee (so etwas wie geklärte Butter, wo die Butter erhitzt und dann das Milcheiweiß abgeschöpft wird) hier ein Rezept von Alton Brown vom US-Sender Food Network) – geht aber auch mit normaler Butter.

Um ehrlich zu sein fand ich das Rezept gut, aber nicht fantastisch. Ich musste mir dann eingestehen, dass ich vielleicht mit etwas zu hohen Ansprüchen an die Sache herangegangen war – warum sollte mein Saag, das ich zum ersten Mal und nach einem abgewandelten amerikanischen Rezept koche, so toll schmecken wie das, das ich letzte Woche beim Inder gegessen habe, der eine Ausbildung zum Koch hat und wahrscheinlich seit Jahren sein indisches Restaurant betreibt? Also, realistisch bleiben: Das Rezept ist keine Offenbarung – aber es ist gut. Vielleicht sogar ziemlich gut. Das jedenfalls haben Allie und Rachel J. behauptet, die sich zum Verzehren eingefunden hatten.

Und noch ein letztes Geständnis: Ich kann keinen Reis kochen. Ich kann es einfach nicht. (Ich wünsche mir einen Reiskocher zu Weihnachten!) Er braucht ewig, ich versalze ihn, lasse ihn anbrennen und anschließend schmeckt er wie salzige, angebrannte Matschepampe. Ich habe es versucht und bin gescheitert – also haben wir Couscous dazu gegessen. Ich liebe Couscous – couscous bleibt mir immer treu. Es brennt nie an und ist im Handumdrehen fertig. Nur besonders indisch ist es halt nicht.

Aber, without further ado: Hier ist das Rezept!

Saag

500g gefrorener Spinat
250g gefrorene Erbsen
2 mittelgroße Zwiebeln
40g Butter oder ghee
½ Teelöffel Salz
3 Knoblauchzehen (je nach Geschmack auch mehr – ich habe wohl eher 6 rein getan)
eine daumenbreit langes Stück frischer Ingwer, geschält und in winzig kleine Stücke geschnitten
2 Teelöffel Kurkuma
2 Esslöffel Kreuzkümmelsamen
1 Esslöffel Koriander
2 Teelöffel Senfkörner
2 Teelöffel Paprika gebrochen scharf (gibt’s beim türkischen Supermarkt) oder Cayennepfeffer
½ Teelöffel Kardamom (oder Inhalt von Kardamomkapseln)
3 ganze Nelken
200 ml Buttermilch
etwas Joghurt
Zitronensaft
Eine Handvoll Sesamsamen

Spinat auftauen: Hier ist die Schwierigkeit, zu vermeiden, dass durch den gefrorenen Spinat das Saag zu wässrig wird. Ich habe den Spinat in einer Plastiktüte im lauwarmen Wasserbad aufgetaut. Die Erbsen würde ich gar nicht auftauen, bevor ich sie dazugebe, damit sie schön knackig bleiben. Den Spinat einfach so lange im Wasserbad stehen lassen, bis man ihn braucht, am besten eine gute Viertelstunde.

Spinat auftauen hat funktioniert!
Für die Gewürzmischung war eigentlich ein Mörser verlangt. Den habe ich aber nicht (ganz so erwachsen bin ich doch noch nicht). Also meine Idee: Gewürze in eine Plastiktüte, Luft aus der Tüte rausquetschen, gut zumachen, und auf einem Teller (falls sich Löcher in die Tüte schleichen) mit einem Glas zerdrücken. Ging gut genug – den Mörser wünsche ich mir zu Weihnachten. Gewürzmischung bei Seite stellen.


Zwiebeln schneiden und in der Butter/ghee auf mittlerer Flamme anbraten, bis sie weich und transparent werden. Dann die Gewürze dazugeben und ca. 5 bis 7 Minuten zusammen weiter braten, immer wieder umrühren, dabei Knoblauch und Ingwer hinzufügen.

Jetzt den aufgetauten Spinat hinzugeben. Gut köcheln lassen (ca. 20 Minuten), immer wieder umrühren, sodass eine schöne, sämige Mischung entsteht. Jetzt die Erbsen dazugeben (ich hatte sie schon am Anfang reingetan, wodurch sie sich total zersetzt haben) und die Buttermilch und weiter unter köcheln lassen, bis sich alles gut miteinander verbunden hat. Nach Geschmack mehr Salz und Paprikaflocken dazutun (alternativ auch Cayennepfeffer).

Jetzt wäre auch ein guter Zeitpunkt, den Reis zu kochen, wenn er dazu serviert werden soll.

Währenddessen in einer flachen Pfanne ohne Fett die Sesamkörner bräunen – die sind schnell fertig, nicht aus den Augen verlieren, sonst verbrennen sie! Damit bestreuen wir beim Servieren

Zu guter letzt eine halbe Zitrone pressen und den Saft hinzugeben – und jetzt noch einmal abschmecken – und voilà! Zum Servieren mit den Sesamkörnern bestreuen.